Bootstrap Tooltip Working
Intro
Sometimes, especially on the desktop it is a great idea to have a subtle callout along with certain pointers arising when the website visitor places the mouse pointer over an element. By doing this we ensure the right info has been presented at the correct time and hopefully increased the visitor experience and convenience while using our web pages. This behavior is taken care of by the tooltip element that has a regular and trendy to the whole entire framework design appeal in the latest Bootstrap 4 edition and it's definitely simple to put in and set up them-- let us check out just how this gets performed .
Things to realise when employing the Bootstrap Tooltip Class:
- Bootstrap Tooltips utilize the 3rd party library Tether for locating . You need to include tether.min.js before bootstrap.js so as for tooltips to work !
- Tooltips are really opt-in for efficiency factors, so you must initialize them by yourself.
- Bootstrap Tooltip Class along with zero-length titles are never shown.
- Define container: 'body' to keep away from rendering problems in extra complicated
elements ( such as input groups, button groups, etc).
- Triggering tooltips on concealed elements will not operate.
- Tooltips for .disabled or disabled features have to be triggered on a wrapper element.
- When activated from hyperlinks which span various lines, tooltips are going to be centered. Utilize white-space: nowrap; on your <a>-s to prevent this behavior.
Understood all that? Outstanding, let's see just how they work with certain good examples.
How you can apply the Bootstrap Tooltips:
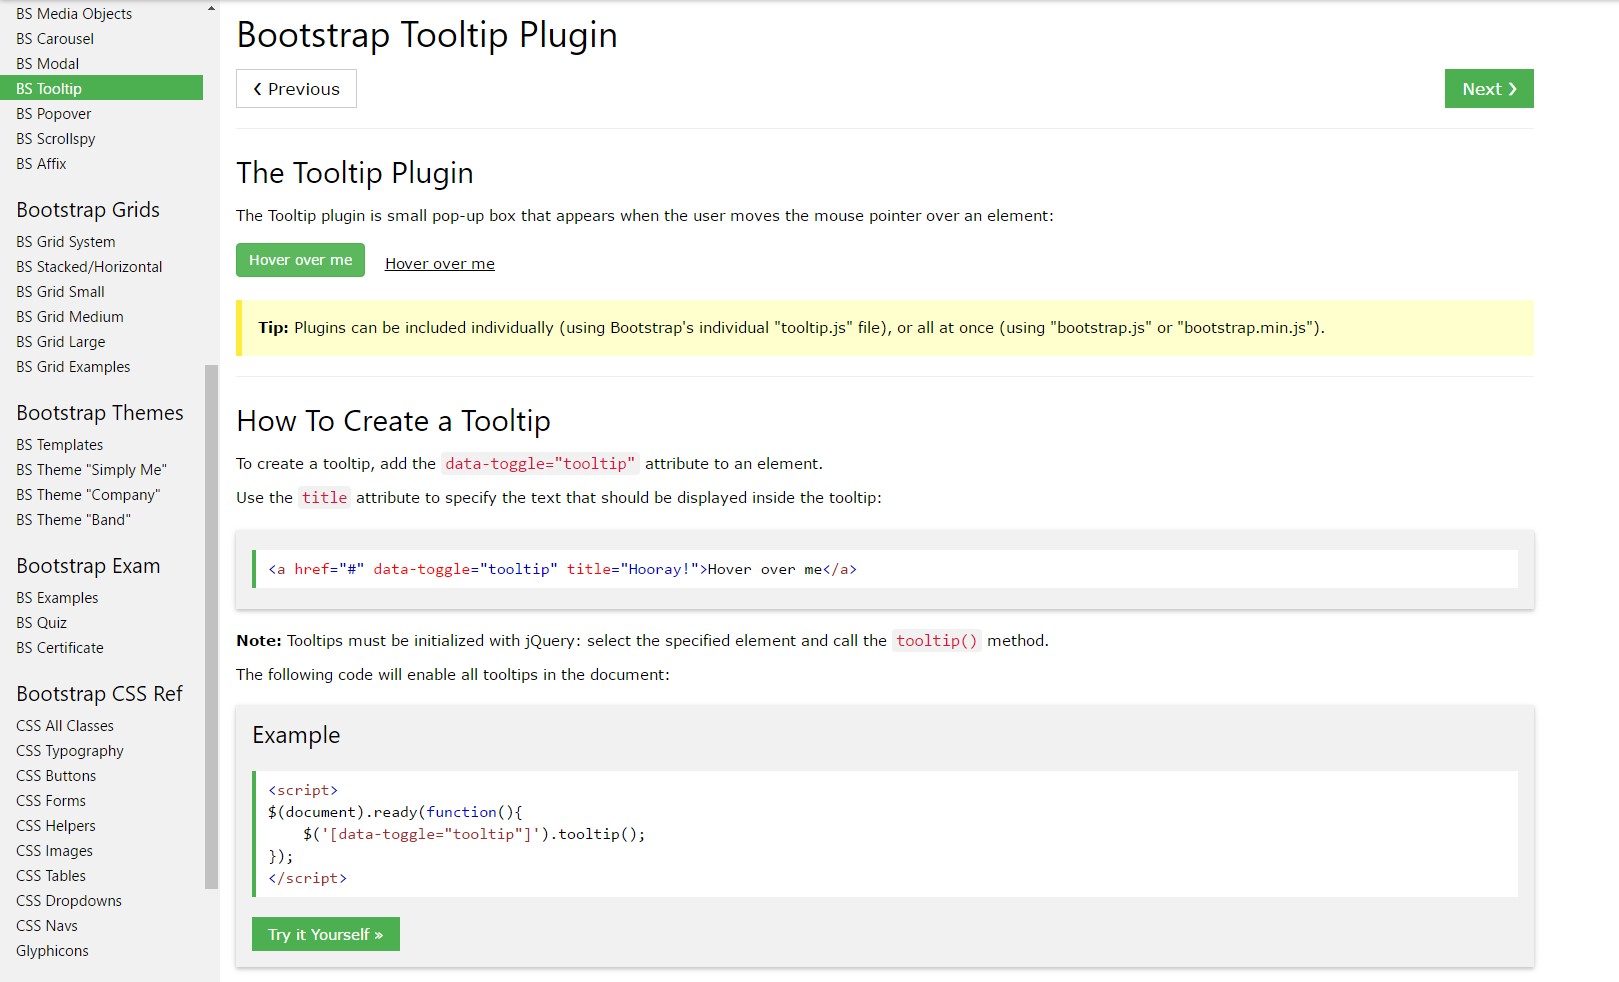
First off to get use the tooltips functions we should allow it since in Bootstrap these features are not allowed by default and require an initialization. To do this include a basic <script> feature somewhere at the end of the <body> tag making sure it has been set after the the call to JQuery library considering that it employs it for the tooltip initialization. The <script> element has to be wrapped around this initialization line of code $(function () $('[data-toggle="tooltip"]').tooltip()) which in turn will switch on the tooltips functionality.
What the tooltips truly handle is obtaining what is actually within an element's title = ”” attribute and displaying it in a stylizes pop-up feature. Tooltips can easily be applied for a variety of components though are usually most suitable for <a> and <button> elements since these are utilized for the visitor's communication with the web page and are far more likely to be requiring some explanations concerning what they actually handle when hovered using the mouse-- right prior to the ultimate selecting them.
When you have switched on the tooltips functionality just to select a tooltip to an element you need to bring in two mandatory and just one optional attributes to it. A "tool-tipped" elements really should possess title = “Some text here to get displayed in the tooltip” and data-toggle = “tooltip” attributes-- these are really pretty sufficient for the tooltip to work out emerging over the chosen element. Assuming that nevertheless you need to point out the positioning of the tip text referring to the element it concerns-- you can surely likewise perform that in the Bootstrap 4 framework with the optional data-placement =” ~ possible values are – top, bottom, left, right ~ “ attribute which values as very obvious. The data-placement default value is top and in the event that this attribute is actually omitted the tooltips appear over the specificed component.
The tooltips appeal as well as behavior has remained almost the identical in both the Bootstrap 3 and 4 versions because these really perform function really well-- absolutely nothing much more to become needed from them.
Examples
One approach to initialize all of tooltips on a web page would be to pick out them by means of their data-toggle attribute:
$(function ()
  $('[data-toggle="tooltip"]').tooltip()
)
Static Demo
Four opportunities are readily available: top, right, bottom, and left coordinated.

Interactive
Hover above the switches below to discover their tooltips.

<button type="button" class="btn btn-secondary" data-toggle="tooltip" data-placement="top" title="Tooltip on top">
  Tooltip on top
</button>
<button type="button" class="btn btn-secondary" data-toggle="tooltip" data-placement="right" title="Tooltip on right">
  Tooltip on right
</button>
<button type="button" class="btn btn-secondary" data-toggle="tooltip" data-placement="bottom" title="Tooltip on bottom">
  Tooltip on bottom
</button>
<button type="button" class="btn btn-secondary" data-toggle="tooltip" data-placement="left" title="Tooltip on left">
  Tooltip on left
</button>
And with customized HTML added:
<button type="button" class="btn btn-secondary" data-toggle="tooltip" data-html="true" title="<em>Tooltip</em> <u>with</u> <b>HTML</b>">
  Tooltip with HTML
</button>
Application
The tooltip plugin produces information and markup on demand, and by default places tooltips after their trigger element.
Produce the tooltip using JavaScript:
$('#example').tooltip(options)Markup
The demanded markup for a tooltip is just a data attribute and title on the HTML component you want to have a tooltip. The produced markup of a tooltip is pretty basic, although it does demand a setting (by default, set up to top by means of the plugin).
Helping make tooltips work for keyboard as well as assistive technology users.
You ought to simply just provide tooltips to HTML features that are certainly interactive and traditionally keyboard-focusable ( just like hyperlinks or form controls). Even though arbitrary HTML components ( just like <span>-s) can possibly be produced focusable simply by incorporating the tabindex="0" attribute, this are going to add most likely annoying and difficult to understand tab stops on non-interactive components for keyboard visitors. Additionally, many assistive technologies presently do not actually declare the tooltip in this circumstance.
<!-- HTML to write -->
<a href="#" data-toggle="tooltip" title="Some tooltip text!">Hover over me</a>

<!-- Generated markup by the plugin -->
<div class="tooltip tooltip-top" role="tooltip">
  <div class="tooltip-arrow"></div>
  <div class="tooltip-inner">
    Some tooltip text!
  </div>
</div>
Opportunities
Options can possibly be pass on by using data attributes as well as JavaScript. For data attributes, append the option name to data-, like within data-animation="".
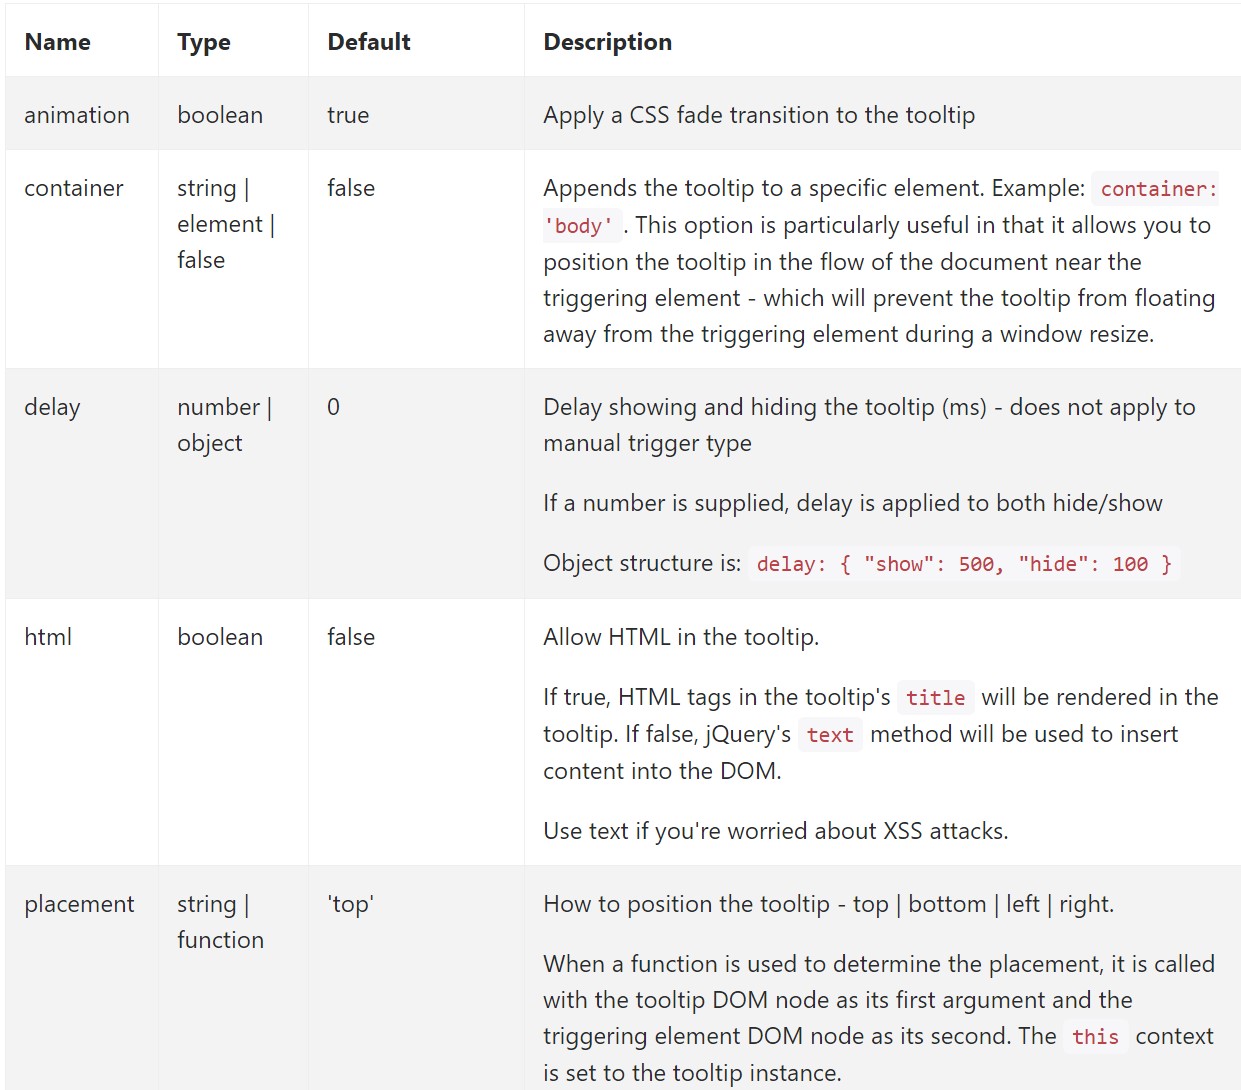
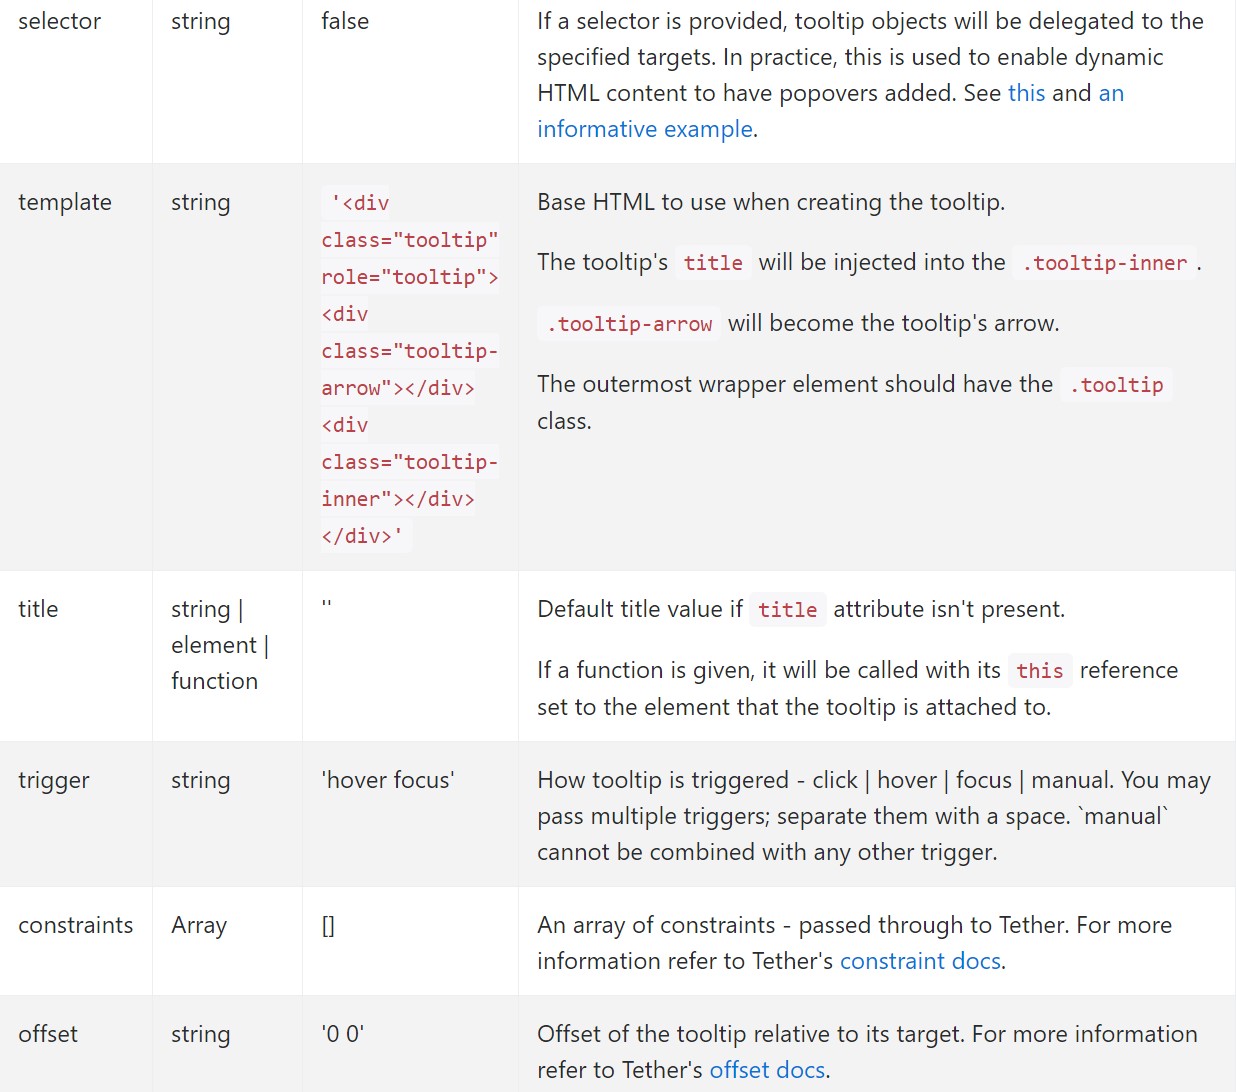
Data attributes for special tooltips
Options for specific tooltips have the ability to additionally be indicated with the use of data attributes, as detailed above.
Approaches
$().tooltip(options)
Attaches a tooltip handler to an element compilation.
.tooltip('show')
Uncovers an component's tooltip. Returns to the caller before the tooltip has in fact been displayed (i.e. prior to the shown.bs.tooltip activity occurs). This is kept in mind a "manual" triggering of the tooltip. Tooltips with zero-length titles are never ever exhibited.
$('#element').tooltip('show').tooltip('hide')
Hides an element's tooltip. Goes back to the caller right before the tooltip has really been covered ( such as before the hidden.bs.tooltip event takes place). This is taken into account a "manual" triggering of the tooltip.
$('#element').tooltip('hide').tooltip('toggle')
Toggles an element's tooltip. Goes back to the caller prior to the tooltip has actually been demonstrated or else stored (i.e. before the shown.bs.tooltip or else hidden.bs.tooltip activity occurs). This is taken into account a "manual" triggering of the tooltip.
$('#element').tooltip('toggle').tooltip('dispose')
Hides and gets rid of an element's tooltip. Tooltips that employ delegation (which are produced utilizing the selector opportunity) can not be separately destroyed on descendant trigger components.
$('#element').tooltip('dispose')Occasions
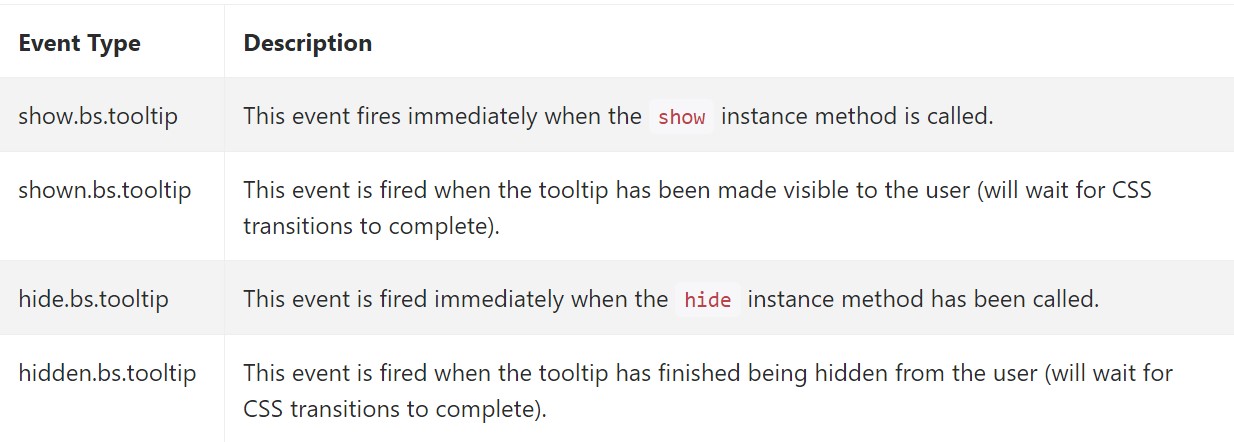
$('#myTooltip').on('hidden.bs.tooltip', function ()
  // do something…
)
Conclusions
A detail to think about here is the quantity of information that comes to be put inside the # attribute and at some point-- the arrangement of the tooltip baseding on the placement of the primary component on a display screen. The tooltips should be precisely this-- quick significant suggestions-- inserting too much information might just even confuse the site visitor instead support navigating.
Also in case the primary feature is extremely near to an edge of the viewport putting the tooltip at the side of this very border might actually trigger the pop-up content to flow out of the viewport and the info within it to become almost pointless. So when it concerns tooltips the balance in utilizing them is necessary.
Review a number of youtube video tutorials about Bootstrap Tooltips:
Connected topics:
Bootstrap Tooltips main documentation
Bootstrap Tooltips article
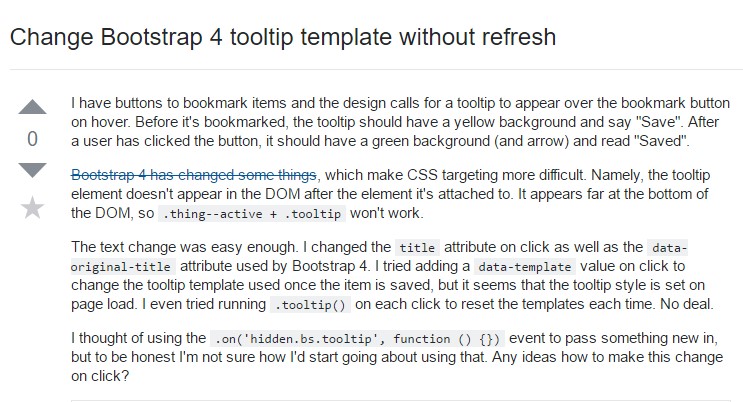
Change Bootstrap 4 Tooltip template without refresh